GitLab
Integrating your Gitlab application with DeepSource requires a Gitlab application. This document outlines the configuration, permission requirements and app configuration to get started with your GitLab account and DeepSource Enterprise.
Creating a GitLab application
- On the top right corner, click on your profile picture. From the drop-down menu, select "Preferences".
- Select "Applications" from the sidebar which appears on the left.
- You'd be prompted to fill a form to create a new application. Enter the following details:
Replace
ORGANIZATION_NAMEwith the name of your organization, andHOSTNAMEwith the actual hostname on which you plan to deploy DeepSource to.
| Field | Value | Example |
|---|---|---|
| Name | DeepSource ORGANIZATION_NAME | DeepSource Stark International |
| Redirect URI | https://`HOSTNAME`/accounts/gitlab/login/callback/bifrost/ | https://deepsource.stark.com/accounts/gitlab/login/callback/bifrost/ |
| Confidential | true | |
| Scope | Check true for api, read_user and read_repository |
- Click on "Save Application".
- You will get
APPLICATION_IDandSECRET. Enter these values in the DeepSource Enterprise admin console.
Configure webhooks for the GitLab application
Gitlab Self-hosted
- Navigate to the Admin section and go to System Hooks.
- Create a new system hook with the following information:
- URL:
https://<deepsource-installation-url>/services/webhooks/gitlab/ - Secret token: Set this to the same value as set in the configuration (in the values.yaml file or the Admin Console config panel).
- Select "push events" and "merge request events" as triggers.
- Set "SSL Verification" to true.
- URL:
Gitlab Cloud
- Navigate to the project or group that you want to create webhooks on. (Gitlab does not allow an org-wide option to enable webhooks).
- Go to Settings > Webhooks > Add new webhook, and enter the following:
- URL:
https://<deepsource-installation-url>/services/webhooks/gitlab/ - Secret token: Set this to the same value as set in the configuration (in the values.yaml file or the Admin Console config panel).
- Select "push events" and "merge request events" as triggers.
- Enable SSL verification.
- URL:
Configuring the GitLab application in the Admin Console
After you create your GitLab application, you need to configure these in the Admin Console for the application to use it.
- Visit the Admin Console
- Navigate to Application -> Config.
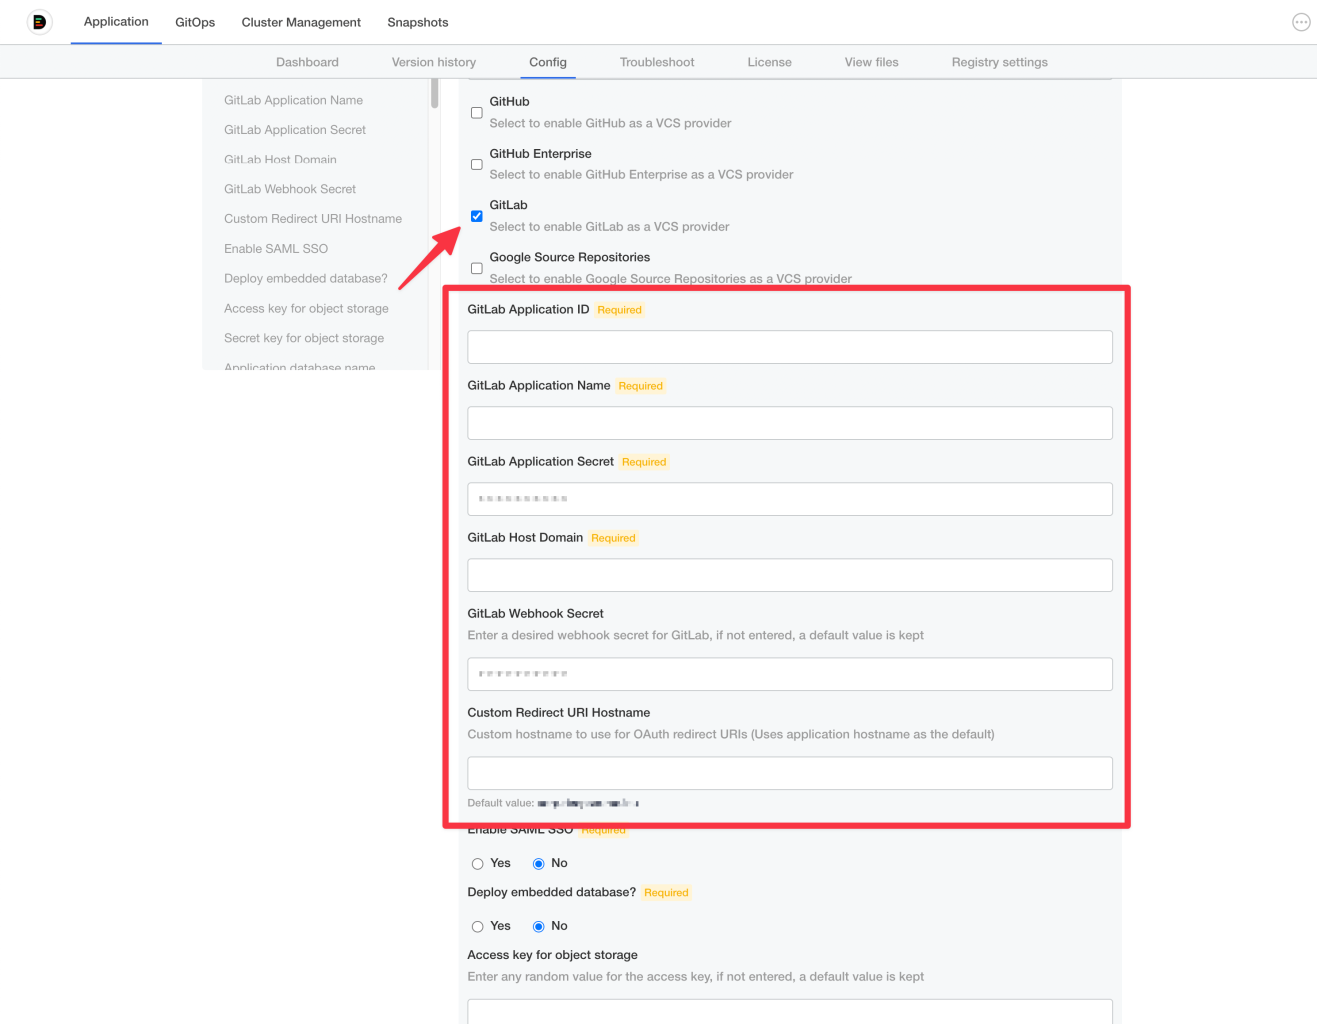
- Select the checkbox for GitLab.
- Fill up the values from the previous step for:
- GitLab Application ID
- GitLab Application Name
- GitLab Application Secret
- GitLab Host Domain
- GitLab Webhook Secret
- Click Save config
You can ignore the Custom Redirect URI Hostname field if you are using the same domain for all traffic.
Updated about 2 months ago