Google Source Repositories
To integrate with Google, we would create an OAuth App, and register the generated credentials with DeepSource (via Kotsadm) -- so that it knows where to route API requests to.
- First, we configure the consent screen. Google mandates that you share the same consent screen across all your apps (per project), so if you've already configured the consent screen for any other app, you can skip to the next step:
- Go to APIs and Services/OAuth consent screen.
- Select the correct project from the project switcher.
- If the consent screen isn't already configured, you'd need to select the audience type: "Internal" if you want to restrict installation to members only, or else "External".
- Give the app an appropriate name.
- Add your email as the support email and in developer contact information.
- Click "Save and continue".
- On the next page, click "Add or remove scopes". On the menu which appears on the right, scroll down and add the following permissions:
https://www.googleapis.com/auth/userinfo.profile
https://www.googleapis.com/auth/userinfo.email
https://www.googleapis.com/auth/cloud-platform
https://www.googleapis.com/auth/source.read_only
- Click "Add to table". The scopes should now have been added to the table and selected.
- Click "Update". Once the menu closes, click "Save and continue".
- Cross-check this information in summary shown.
- Go to APIs and Services/Google Cloud Credentials:
- Click "+ Create credentials". Select "OAuth Client ID" from the dropdown.
- Select "Web application" as the application type.
- Give an appropriate name, e.g., "DeepSource".
- Under the heading "Authorized Redirect URIs", add https://deepsource.company.com/accounts/google/login/callback/bifrost/ (Replace deepsource.company.com with the URL at which deepsource is deployed).
- Click "Create". It shall now display Client ID and Client Secret. Keep both of these values handy: we'll need them later.
- DeepSource uses the Cloud Resource Manager API (to list and view projects) and Cloud Source Repositories API (to read source code). If the APIs are not enabled, enable them by vising the following (make sure to select the correct project):
Configuring Google Source Repositories in the Admin Console
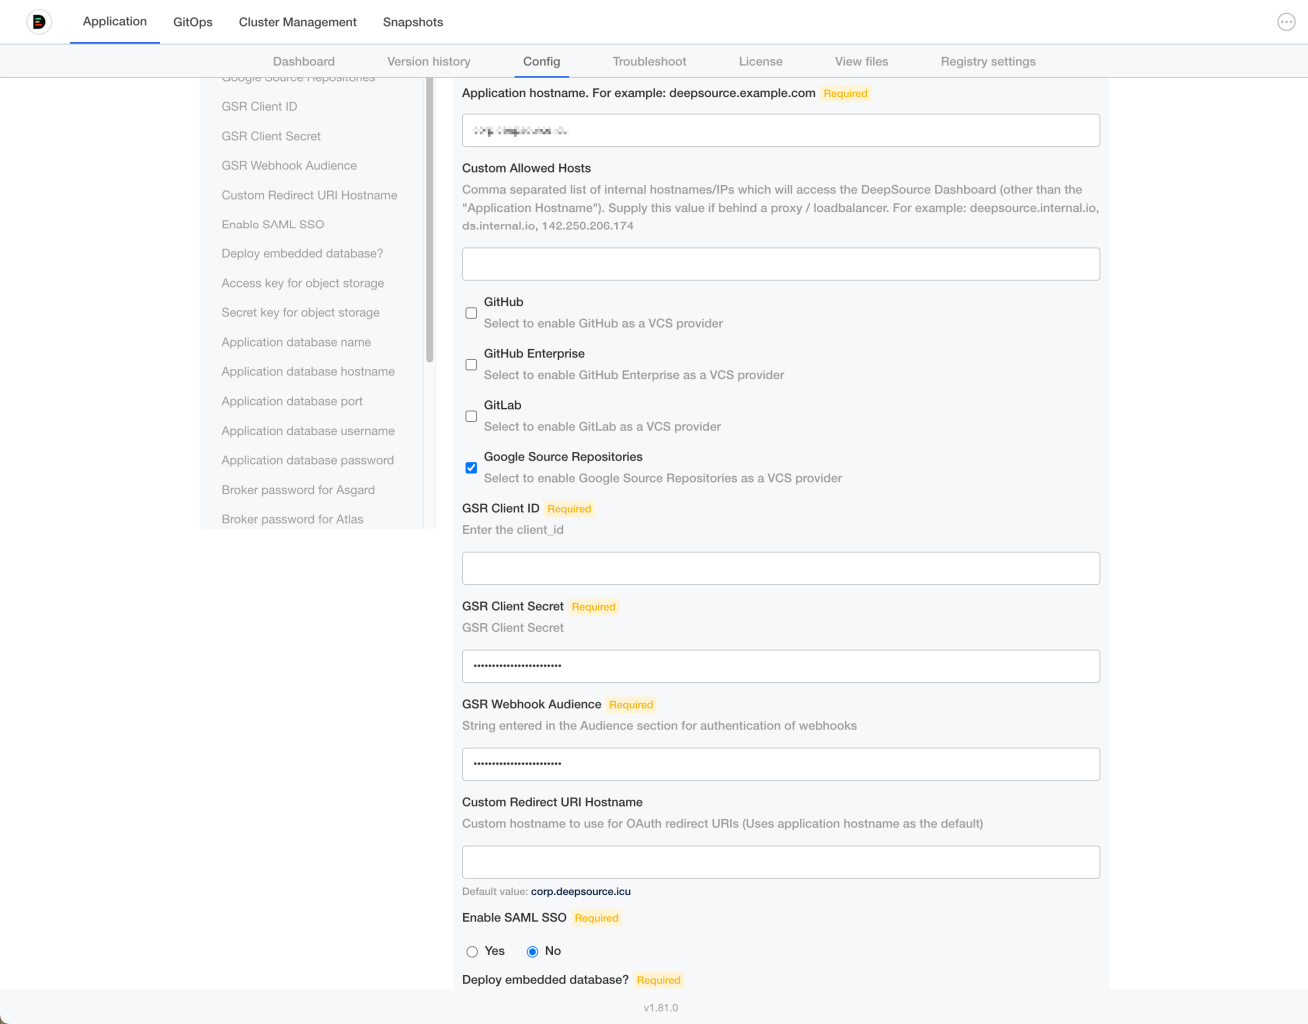
- Enable "Google Source Repositories" by clicking on the checkbox.
- Enter the Client ID and Secret you copied above.
- Enter a random string for "GSR Webhook Audience". Make sure to note it somewhere safe as you'll be asked to enter it again when registering webhooks later. You can use the following command:
LC_ALL=C tr -dc A-Za-z0-9 < /dev/urandom | head -c 18
Now your instance is ready, and you can go ahead and "Sign in with Google". Once you select a project, you'll also need to perform the following before proceeding:
Turn on webhooks
Running the following script will set it up for you:
#!/usr/bin/env sh

read -p "Enter the GCP project ID: " PROJECT_ID
read -p "Enter the GCP project number: " PROJECT_NUMBER
read -p "Enter the application hostname (e.g., deepsource.company.com): " DEEPSOURCE_HOSTNAME
read -p "Enter the audience webhook keyword you entered in the configuration portal: " WEBHOOK_AUDIENCE

# Ensure that you've selected the right project
gcloud config set project $PROJECT_ID

# Create a "deepsource" topic.
gcloud pubsub topics create projects/$PROJECT_ID/topics/deepsource

# Configure GSR to publish a message as soon as a change is pushed to any of
# the repositories for the given project.
gcloud source project-configs update \
    --add-topic projects/$PROJECT_ID/topics/deepsource \
    --message-format=json

# Only for projects created on or before April 8, 2021:
# grant Cloud Pub/Sub the permission to create tokens
PUBSUB_SERVICE_ACCOUNT="service-${PROJECT_NUMBER}@gcp-sa-pubsub.iam.gserviceaccount.com"
gcloud projects add-iam-policy-binding ${PROJECT_ID} \
    --member="serviceAccount:${PUBSUB_SERVICE_ACCOUNT}" \
    --role="roles/iam.serviceAccountTokenCreator"

# Next, we configure GSR to publish a message as soon as a commit is
# pushed to any of the repositories. However, in order to do that, we need to
# create an iam account. Let's get that out of the way:
gcloud iam service-accounts create deepsource-gsr \
    --description "Push messages, received from GSR, as webhooks to DeepSource for analysis." \
    --display-name "DeepSource Analysis for GSR"
GSR_SERVICE_ACCOUNT="deepsource-gsr@$PROJECT_ID.iam.gserviceaccount.com"

# Allow the service account to consume a pubsub subscription.
gcloud projects add-iam-policy-binding $PROJECT_ID \
    --member="serviceAccount:${GSR_SERVICE_ACCOUNT}" \
    --role="roles/pubsub.subscriber"

# Subscribe to the topic we created before. It allows us to push out a webhook
# as soon as a message is received on the 'deepsource' topic.
gcloud pubsub subscriptions create projects/$PROJECT_ID/subscriptions/deepsource \
    --topic projects/$PROJECT_ID/topics/deepsource \
    --push-endpoint https://$DEEPSOURCE_HOSTNAME/services/webhooks/gsr \
    --push-auth-token-audience $WEBHOOK_AUDIENCE \
    --push-auth-service-account ${GSR_SERVICE_ACCOUNT} \
    --min-retry-delay 10 \
    --max-retry-delay 600
Register the SSH Key
- Copy the SSH key from the screen.
- Go to https://source.cloud.google.com/user/ssh_keys?register=true. It might ask you for a password:
- Add a suitable name, e.g., "deepsource"
- Paste the public key and click "Register".
Updated 11 months ago